
I was intrigued by the idea of powder coating the parts of the microscope arm project, as well as other items. So, I decided to do a little bit of shopping to get outfitted with a beginner setup. I started with the somewhat ubiquitous Craftsman powder coating gun, which seems to be available on closeout from a variety of places. It’s a nice choice to try out powder coating because it’s cheap, and it’s self contained. Higher-end guns all tend to use an external compressor (which I do have), and work best with an air drier (which I don’t). Next, I ordered a cheap and tiny toaster oven from Amazon, though I can’t exactly recommend this particular model, for reasons I’ll get into later. Lastly, I ordered a variety of powders from Columbia Coatings, in their smaller 1/2lb jars.
The gun and the oven arrived on a Friday, leaving me with no powders to experiment with over the weekend. Fortunately, I remembered that Harbor Freight carried a few colors of powder for cheap money ($5/lb), so I made the trip up to the store that recently opened near me, and left with one jar of each color as well as a bunch of other stuff for surface preparation. I picked a relatively old project that I had done to be the subject of my first powder coating experiment.
I did a small amount of sanding with 500 grit wet-dry paper, and cleaned up the part using isopropyl alcohol. I masked off the areas I did not want coated using high temperature tape and plugged some critical holes with silicone plugs. Tape and plugs are both included in the Craftsman kit, but are also available from powder coating vendors.
I built a makeshift booth out of a cardboard box, and hung a piece of bare copper wire through the top of it. I used one of the included S-hooks to hang my part off of the wire. Outside of the box, i attached the ground lead of the coating gun, which is a necessary step for the electrostatic process to work properly. I loaded up a couple of spoonfuls of the matte black powder into the hopper on the gun, and got the feel for the variable speed trigger by shooting some powder into a corner of the box. Then I moved on to coating the part, which was surprisingly easy. When everything is working correctly, the electrostatic attraction makes the powder stick to the part like magic!
Before starting the coating process, I had stacked up some aluminum scraps on my bench, which allowed me to (somewhat) safely turn the toaster oven on its back side. I also disabled the spring in the door, thus allowing me to easily lower parts in from the top and hang them on a piece of scrap aluminum bar which I had temporarily rigged across the mouth of the oven.
Once fully coated on all sides, I carefully lifted the part out of the ‘booth’ and lowered it into the pre-heated toaster oven. Because the oven I bought was so cheap that it didn’t even include a temperature controller, I had to try to regulate temperature manually. I had recently picked up a cheap $50 Extech multimeter specifically for a couple of features it offered that my nicer meters don’t have, including coming with a K-type thermocouple in the box. I hastily floated the thermocouple probe roughly in the vicinity of the part inside of the oven, knowing full well it wasn’t a perfect representation of the part temperature.
It took several minutes for the part to get hot enough for the powder to “flow out” and go from powder form to liquid form. Once it hits this stage, the temperature needs to be maintained for 15-20 minutes for curing to happen properly. It goes without saying that this is pretty boring, especially if you’re sitting there playing the role of a bang-bang temperature controller by turning the oven on and off to try to keep it roughly in the range of the recommended 400 degrees Fahrenheit. I accidentally got into an “overbake” condition during one of the runs, bad enough to have melted some of the supposed “high temperature” tape. This is why you want a temperature-controlled oven.
Once the cure time has passed, ideally you should let the part cool down to a safe temperature slowly. Once cool, the finish is ready to go! The end results of the matte black experiments can be seen in the photos below. Not perfect, but not bad for a first attempt.
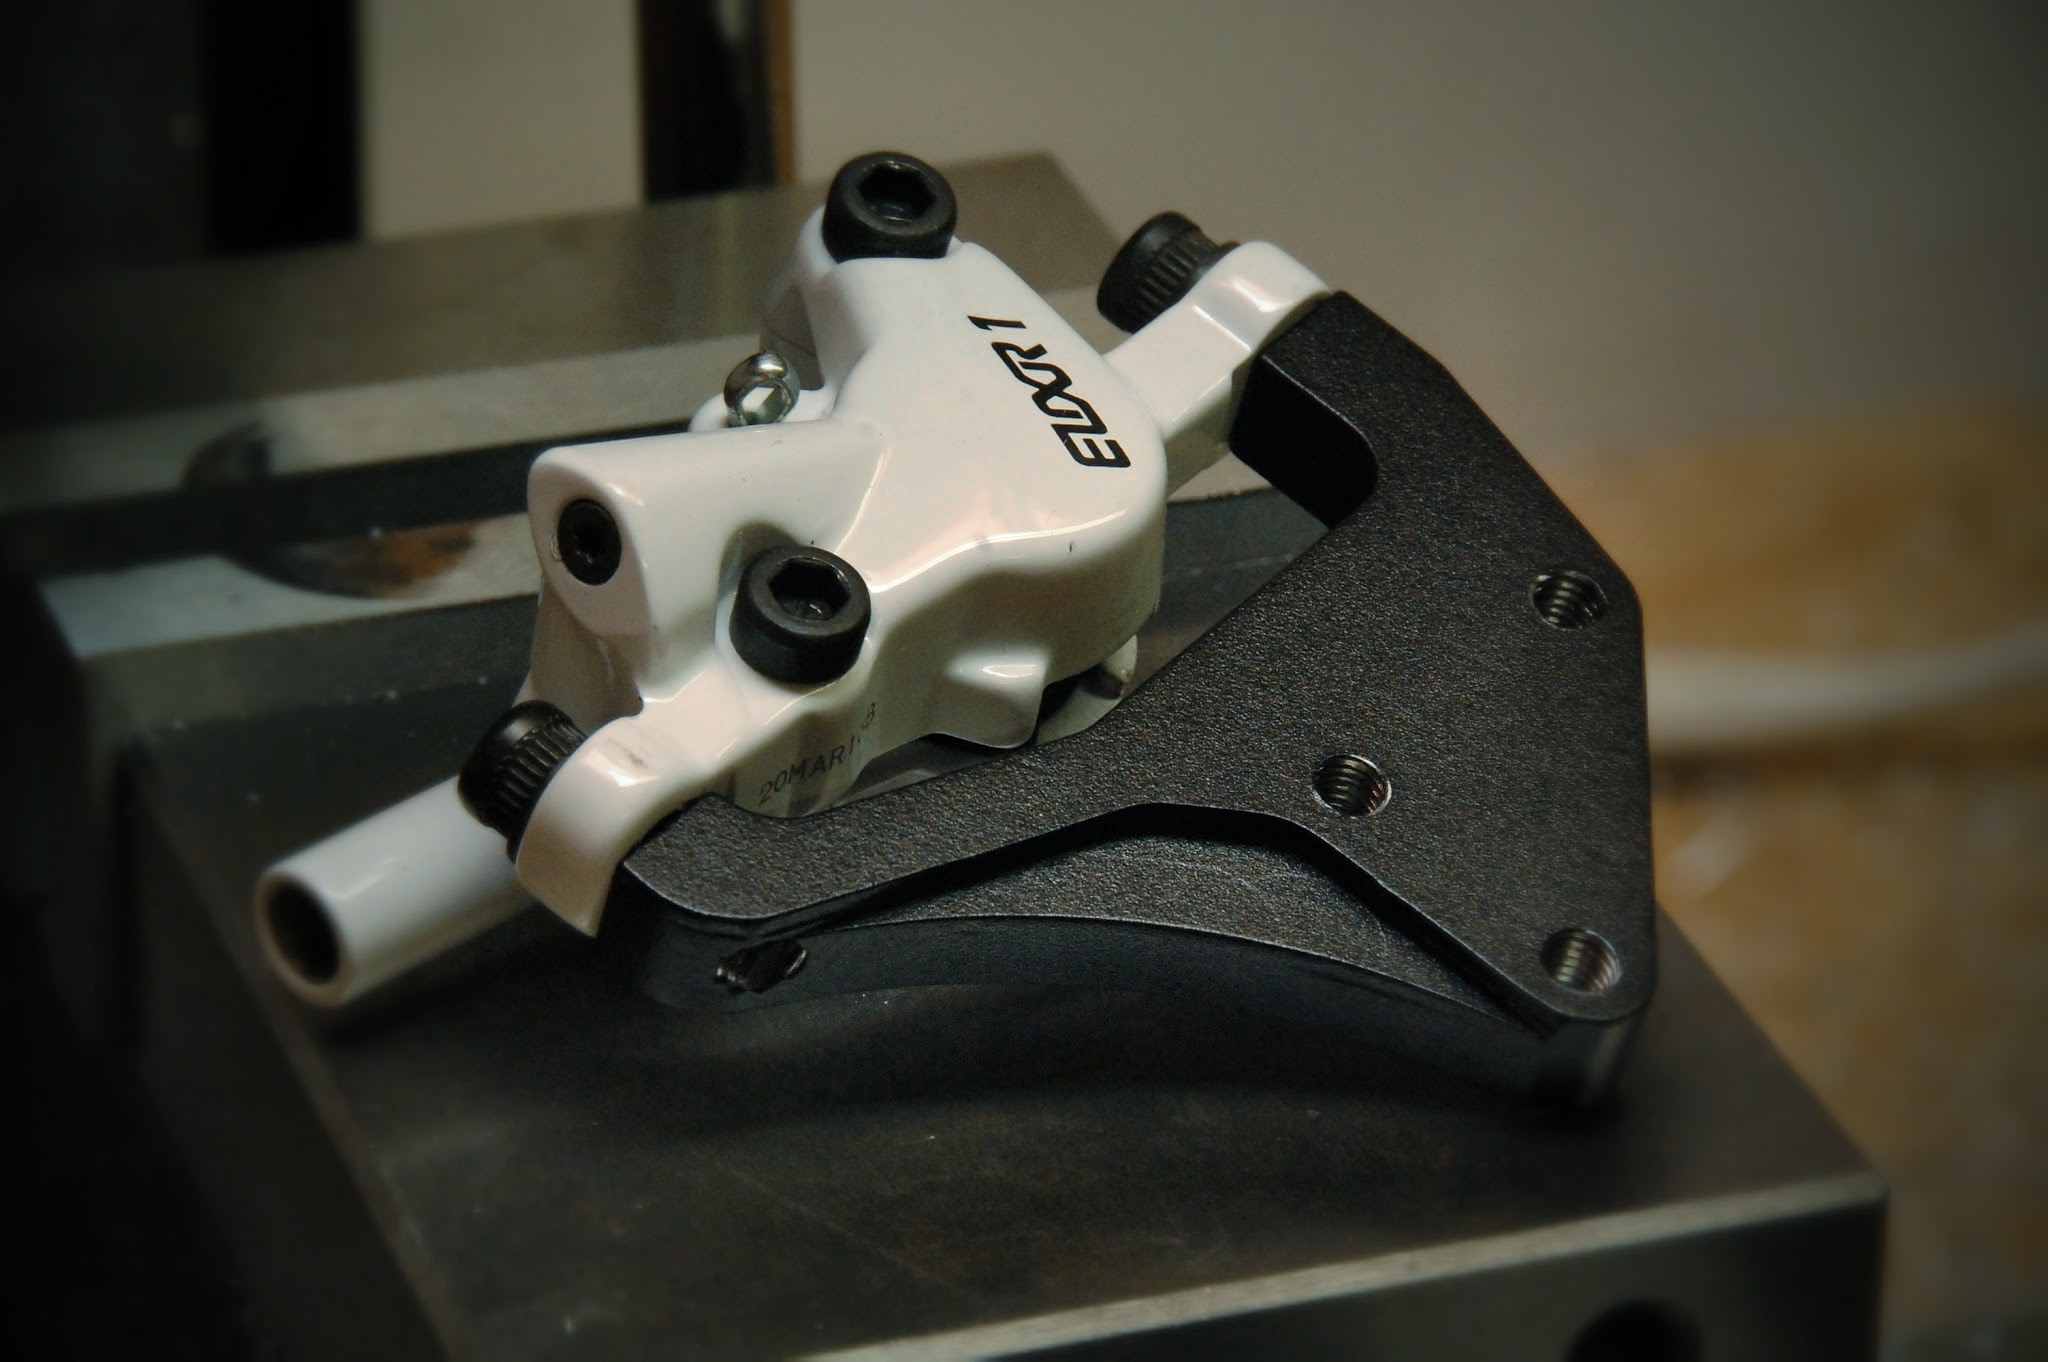
A couple days later, my Columbia powders arrived. Itching to try them out, I pulled another old CNC project off the shelf and decided to try the Reflex Blue TGIC color, somewhat in honor of the old blue motorcycle for which the project was originally done. I spent a bit more time on surface preparation, though still not enough as some of the machining marks still very clearly telegraph through the finish, as shown in the photo at the top of this post.
All in all, I’m pretty excited by the possibilities! I did some hunting on ebay and picked up an industrial PID temperature controller (with platinum RTD temperature sensor, and a solid state relay) and also a digital timer module. I will use this stuff to give the oven some proper temperature and timing control. Yeah, it’s way overkill, but it’s fun, and sometimes that’s the only excuse I need.
I think I’ll want a larger oven some time, as I am quite limited in terms of what I can fit into this tiny oven. But for now, it’s certainly plenty to get my feet wet with the process, and it’ll handle many of the ideas I can dream up and machine on my CNC mill and lathe. I also think I’ll be considering a media blasting cabinet in the not-too-distant future, as this would help greatly with surface preparation on the parts, making it much easier to remove tooling marks before powder coating.
[nggallery id=44]
Fantastic video and post. It’s very rare to find valuable examples (instructions). Btw, do you have a rough schematic of how you wired the PID and timer that you’d be willing to share? Basically the entire oven setup!