[singlepic id=198 w=640]
My little EX500 bike is a bit cramped for me. One of the worst problems is that my wrists, especially my throttle wrist, have been going numb even after only short rides. I thought it would be worth trying some handlebar risers to bring the grips a bit closer to me, and improve the angle between my wrist and the bar. There are some commercially available risers for the EX, but given that I have a CNC machine and a penchant for making things more difficult than they need to be, I thought I’d try making my own.
The basic idea of the commercial risers seemed sane enough, so I figured I’d just copy them. The only real trick was measuring up one of the flanges on the handlebar, which I did a couple of weeks ago on a cool and rainy Saturday morning. With a bit of guesswork and a few 1:1 printouts, I was able to zero in on a close match to the OEM handlebar flange, and I knew I was on my way. After staring at the CAD for a short while, I determined I would go one step further and do a bit of a custom twist, and add tabs to hold a small “dashboard” for a GPS mount or other possibly for accessories like a Powerlet plug.
I ordered a couple of large chunks of 2024 aluminum bar stock (1.5″ x 3.5″ x 10″) off of eBay for a pretty good price, tracked down the longer M8-1.25mm bolts I would need to replace the stock bolts in the handlebars (I used 50mm length), and picked up a new 3/8″ 3 flute endmill with a 1.5″ cut length so I could actually mill the thick stock. With all of the materials in hand, and the prospect of a bunch of motorcycling coming up this weekend, I figured I’d push to try to get the risers fabricated in an evening, and was successful, barring a couple of recoverable hiccups.
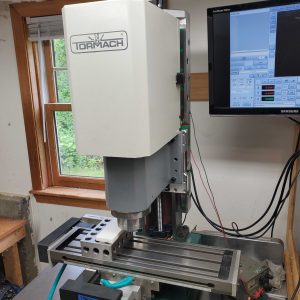
This project is the first when I really made use of the new Tormach tooling system that I bought with all of my leftover nickels and dimes a couple months ago. I didn’t do anything super fancy, but the main part of the machining did have one tool change. Had I done all of the drilling by CNC instead of manually, I would have done several more tool changes. The major lesson learned is that the drawbar really needs to be tight, much tighter than is typically required for a normal R8 collet. This is the second instance where I’ve had the tool get loose in the Tormach collet and dive into the workpiece. Thankfully it was during contouring, and I was able to recover, though I did lose precision on the part because I had to re-zero it. The corollary lesson is that I need to more diligently create and use a zero touchoff point for X and Y so in case of having to re-zero I can get closer than I did this time.
The third major area is improving my fixturing techniques. I lose some amount of precision when I bolted the workpiece down to the fixture plate that I made. I simply was not able to get it to line up with the original drill positions as closely as I wanted. I think the cheap Chinese 5/16″ bolts I was using were all bent and forcing the workpiece this way and that, not allowing me to properly align it with the soft hammer and dial indicator.
All in all, it was a low precision part so none of the mistakes/problems really mattered. And, as you can see by the photos, it fit perfectly fine despite the troubles. In fact, it was one of the easiest fitups I’ve done – no problems whatsoever mounting the risers on the motorcycle this morning.
Next up is to measure and design the crossbar “dashboard” plate which will mount between the two tabs that protrude. There will be some careful balancing of where that plate falls, to make sure I still have enough room for the ignition key.
[nggallery id=22]
Hi!
I have a same motorcycle and i also want risers for it. Can you send me the Cad file or cnc program for this cool riser? Thank you very much.
Ferenc from Hungary
HI!
Have you bar riser kit for Kawasaki ZX12R 2004
Thank’s for replay
Best regards Damir from Zagreb-Croatia
Would you be willing to share the CAD drawing?