It seems to be a rule that no matter what size electronics enclosure you have, you will always have at least 10% more stuff that you need to cram into it. I have an excuse in this case – I bought this enclosure ten years ago, when I upgraded to the Tormach head. I needed a place to put the VFD, as it would not fit inside of the electronics enclosure that I had just completed a year prior.
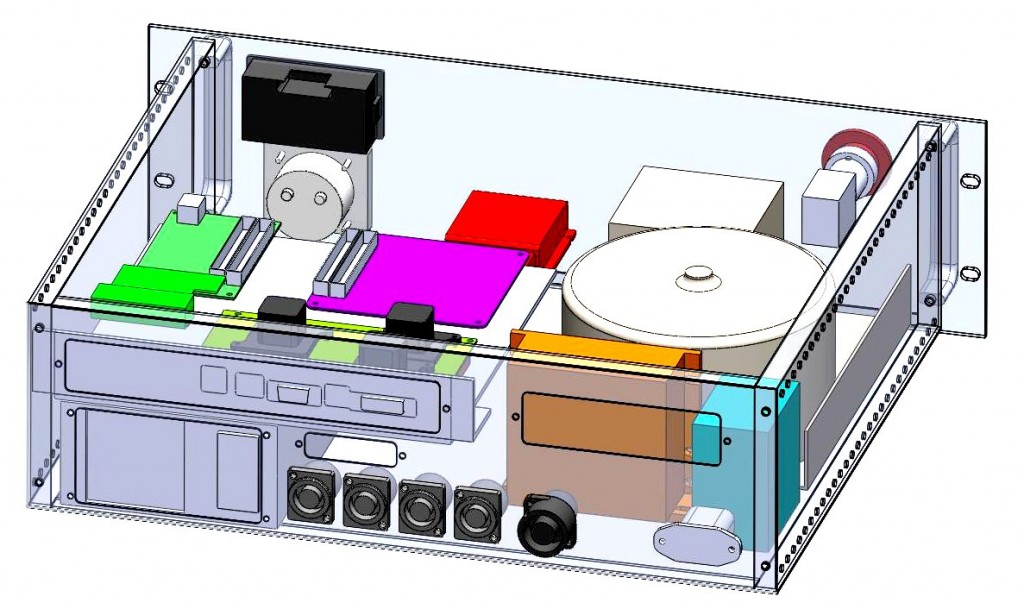
I never got around to moving the electronics from the rack mount enclosure into the new Hoffman style cabinet back in 2013, but I knew I wanted to tackle that as part of this project revival. I think I could have have fit everything in that enclosure just fine, back then. However, I am making a number of changes to the control electronics, and leaning more into industrial automation style wiring versus a more integrated circuit board approach. I was kind of allergic to the concept of industrial automation style wiring when I started on my DIY CNC journey in 2009, but I’ve grown to appreciate it since then. I think my bias was coming from a career of developing integrated electronics from custom PC boards, instead of building products from off-the-shelf modules.
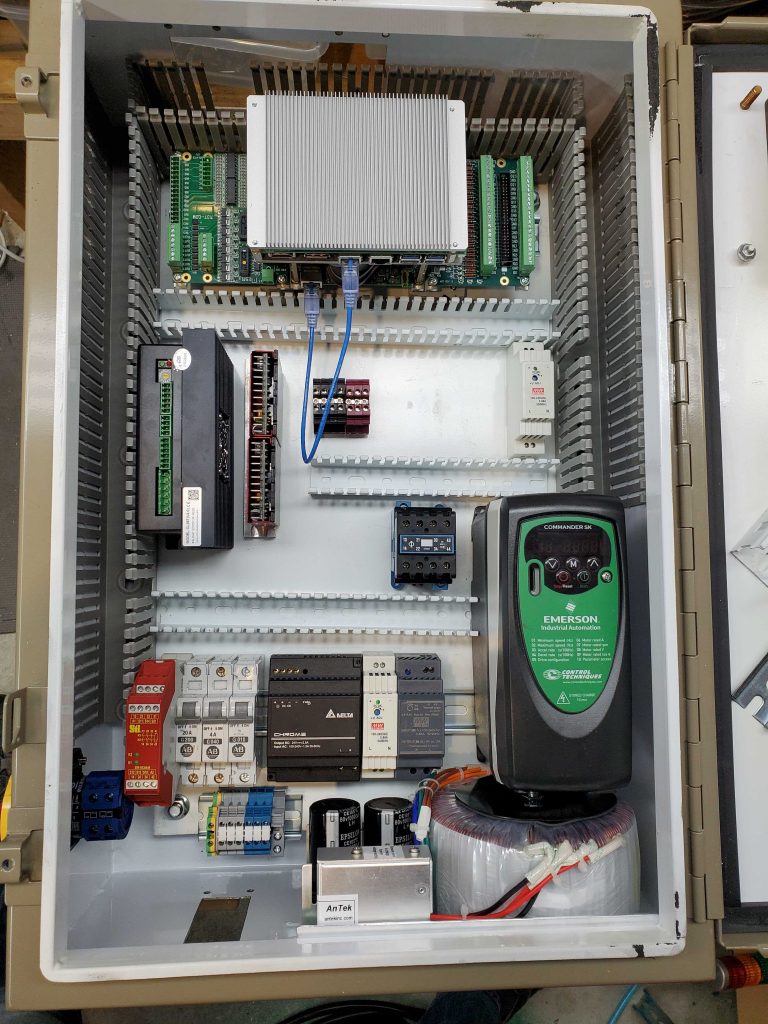
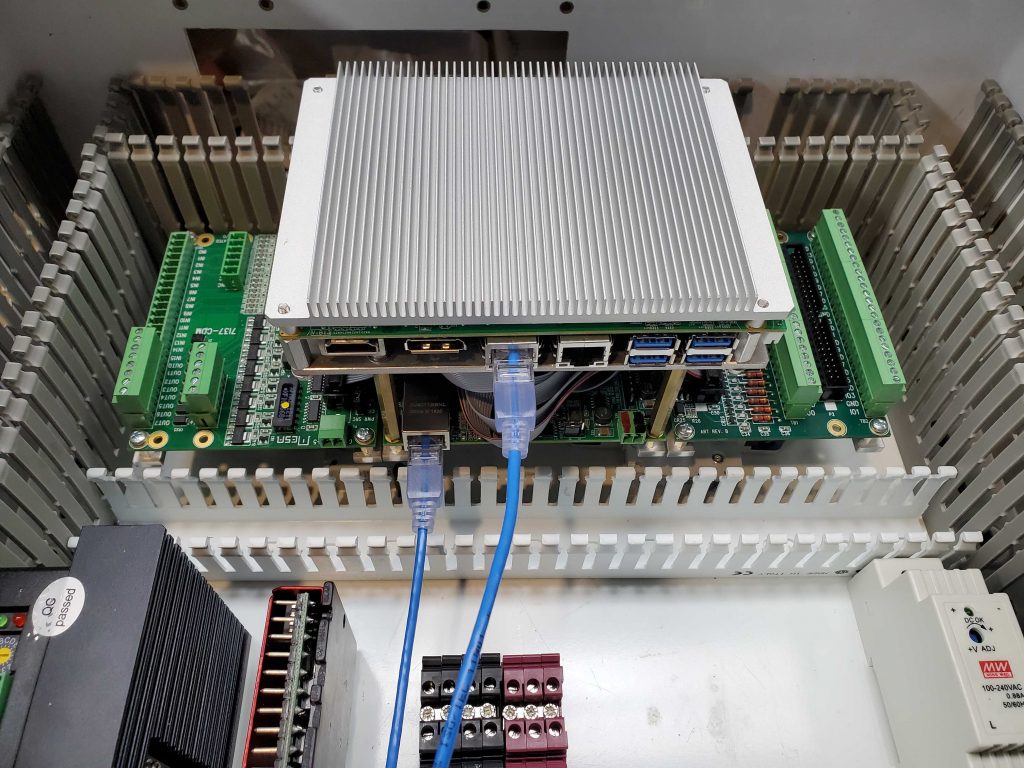
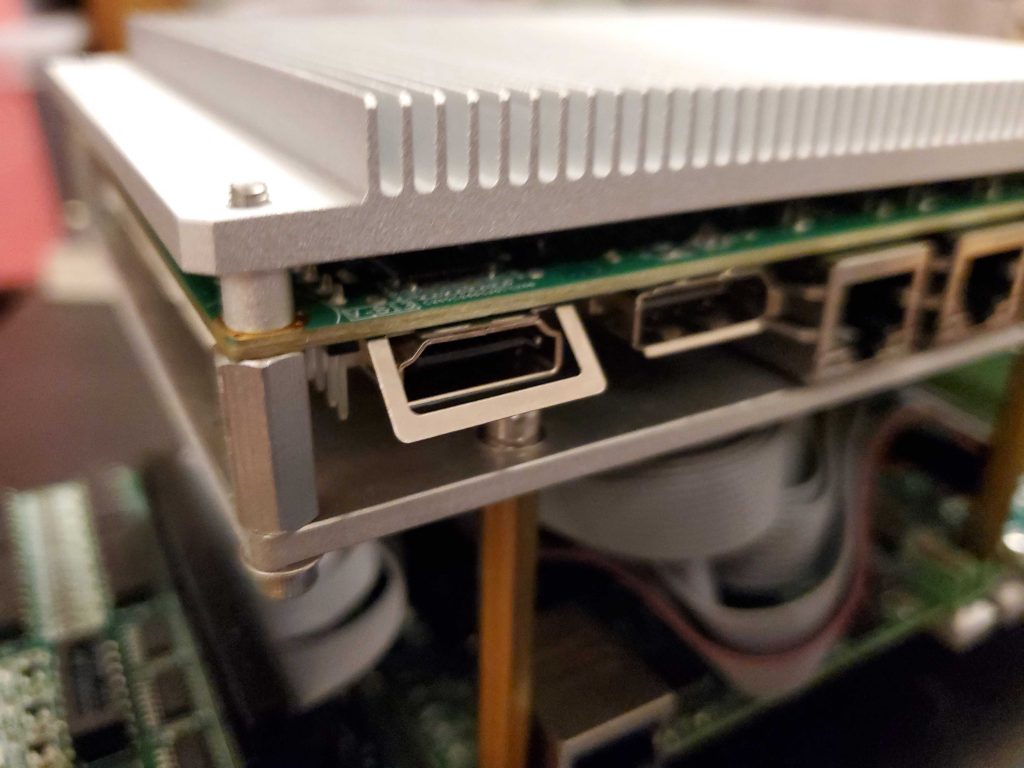
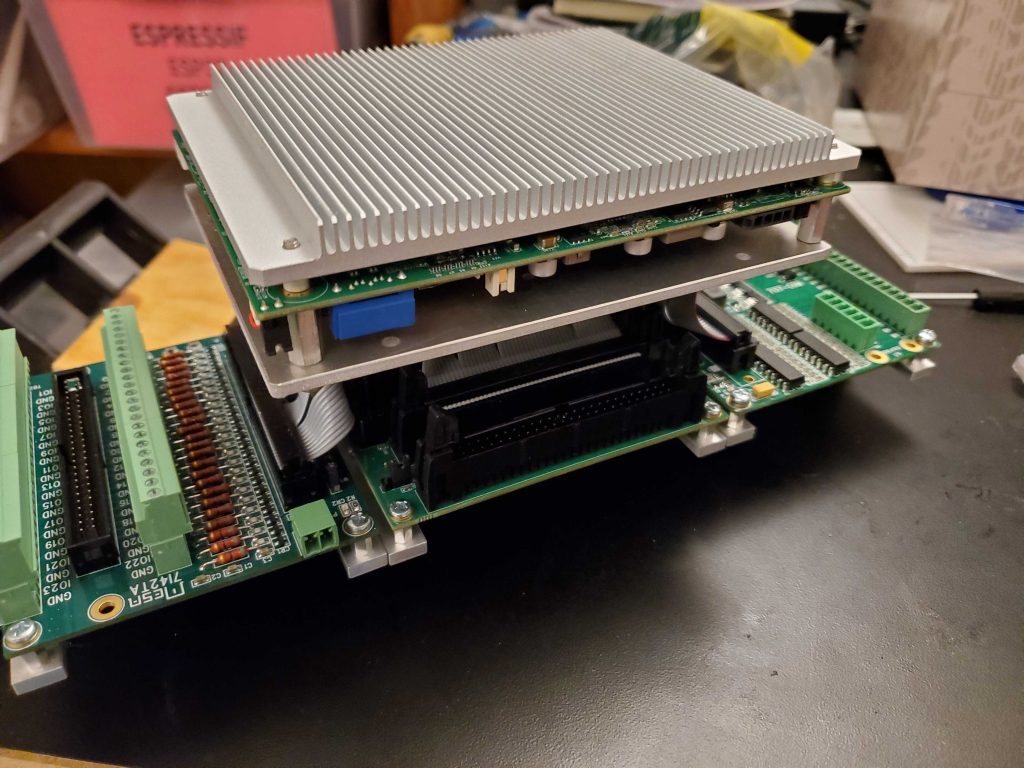
These electrical cabinets cost an arm and a leg, even on the surplus/used market. So even though this cabinet might be a little cramped, I think I’m wise to use what I have and get creative. You can see that I mounted the new 70V DC power supply on the bottom of the cabinet (lower right). I’m also playing with stacking the control electronics – three Mesa boards and an embedded industrial PC. I cut out a simple mounting hole adapter plate from 1/8″ aluminum on the Protomax waterjet to make this possible. The new embedded PC looks pretty cool up top with the heatsink.
Updated electronics will include:
- Kontron ECX-APL0 fanless industrial PC – more modern fanless embedded PC motherboard to replace the decade-old one
- Mesa 7i80HD Ethernet based FPGA controller, replacing the old 7i43 parallel port connected FPGA card.
- Mesa 7i37-COM isolated input/output board and a Mesa 7i42TA I/O protection board – replacing much of the functionality of the custom I/O board I built years ago.
- StepperOnline CL86T closed-loop stepper driver for the new Z axis motor, replacing one of the original Gecko G203V stepper drivers.
- STI Omron SR103AM safety relay, replacing the E-stop functionality from my custom I/O board.
- +24V, +12V, +5V DIN power supply modules adding +24V and replacing the small PC power supply for 5/12 in the old cabinet
- Antek PS-8N70 70VDC 800W power supply for stepper drives. An upgrade to the original Antek 48V supply.
- VFD integration into the cabinet
- Better safety interlocking with two new contactors to control the 70V supply and the VFD
- Better use of wiring channel, terminal blocks, etc., per industrial automation standards.