Sloppy Z

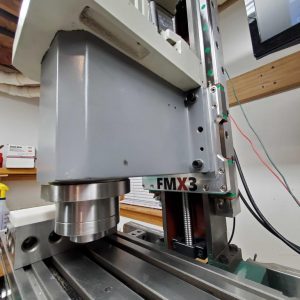
So I’m having some major trouble with slop in my Z axis, regardless of how tightly I’ve cranked down the gib adjuster.   While what follows may not be the best test setup, I wanted to at least come up with some way of showing what I’m seeing.  I attached the magnetic base to the head, on the left hand side near the front edge. I set up the dial indicator to indicate off of the surface of the table. I then apply upward force on the front edge of the head, causing it to “tip back.”

I can feel the head wobble in the ways as I do this, and the dial indicator moves ~0.030″ typically, though I’ve seen it jump as much as 0.040″.

Here’s a video which shows this test.

I haven’t yet pulled the gib out to see how badly formed it may be.  I’ve read at least one forum post where someone has had roughly the same experience, and they indicated that their gib was really badly made.  Some folks suggest making a new gib out of brass to solve this problem.  I don’t know how difficult this will be just yet…
Related Posts

Project Frankenmill – Part 33, Claustrophobia

Final positions for the DIN rails and wire management have been nailed down. It’s much more tight than one should really wire a panel like this, but…

Project Frankenmill – Part 32, You’re Gonna Need a Bigger Boat

It seems to be a rule that no matter what size electronics enclosure you have, you will always have at least 10% more stuff that you need…

Project Frankenmill – Part 31, Full Pull

While I still haven’t gotten into the detail of squaring and tramming, I’ve been intensely curious to see if the new Z axis would be happier with…

Project Frankenmill – Alpha and Omega

Since 2009, I’ve been messing around with CNC machines. I started out with a small manual milling machine from Grizzly, and converted it to CNC using a…

Project Frankenmill – Part 30, Do You Even Lift Bro?

Hauled the column back down to the shop and mounted it back on the machine. Sure is a lot heavier than it used to be! Muscling things…

Project Frankenmill – Part 29, More Machining and Motion

Had some productive time in the shop during the holiday. First step was to make the counterbores for the M6 cap screws a bit deeper. Easy to…

Leave a Reply

Your email address will not be published. Required fields are marked *