[singlepic id=237 w=320 h=240 float=right]
My passion for in-car tunes goes back well over ten years, with the a half-finished (but functional) automotive MP3 player that could emulate a BMW CD changer. It seems so quaint now, but it’s key to remember that those were the days before the iPod even existed! After receiving an iPod as a gift in 2005, I ditched my unfinished project for a quirky-but-workable Dension ICE-Link iPod-CD Changer emulator and lived with it for several years.
I recently bought a new car, which led me to reconsider my options for music and navigation. Of course, my old Dension iPod dock was useless in the new car, with BMW switching over to a fancy fiber optic entertainment bus in the E90 series. With nothing tying me to the past, I had the chance to reconsider my options from the ground up.
I’ve had a Motorola Droid phone for over a year now. It’s a device I carry with me every day, and after some long searching I found acceptable applications to do most of the tasks I wanted to do, so I decided it would be a reasonable choice to perform navigation, music and podcast duty in my new car.
YouTube video below for the tl;dr crowd, with full text and photos below the break.
[youtube s1ndyB0uUmE]
Criteria
I knew I would want a nice docking solution that would firmly hold the phone and charge it. I did not want to see any dangling wires, or have to connect things in an awkward fashion when I wanted to use a device.
I wanted to be able to remove the entire phone dock when I park in places where I don’t want to invite a break-in. Lastly, I wanted to be able to quickly swap in other devices, such as my Garmin GPS, and have them secured and powered, also without any wires showing.
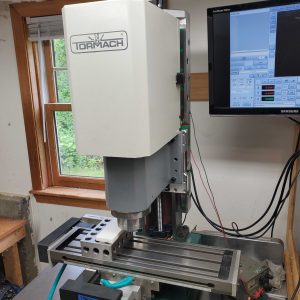
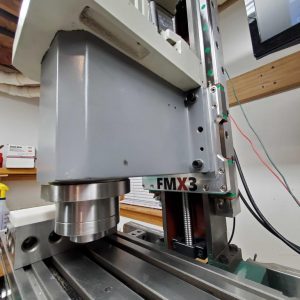
My solution mixes some off-the-shelf parts with some custom mechanical components that I designed and fabricated using my CNC-converted milling machine.
Off The Shelf Parts
- Kuda USA BMW E90 Dash Mount – Finding a nice place to mount a device inside of a modern car is a bit of a challenge. Kuda makes a nice dash mount which, while a little more expensive than I would like, looks good and provides a mounting position perfect for a device with a screen. It is also a no-damage installation – no drilling holes required! This was a must for my installation.
- Motorola Droid/Droid2 Car Dock – I decided that the quickest path to a working, attractive car dock would be to modify an existing one. A little-touted feature of the Droid2 car dock is that it has an adapter plate included in the package which allows it to work with the mechanically similar original Droid. The dock looks nice and holds the phone quite securely. It also has a permanently affixed micro-USB plug, which mates to the phone’s micro-USB socket, providing a true docking experience without fussing with cables.
- Car charger included with the Droid dock kit. By re-packaging the tiny switching power supply PCB included inside of the body of the cigarette lighter plug, I was able to quickly and cheaply supply 5V to my custom dock. Yes, I can design switching power supplies myself or I could have bought a module, but why bother when I had one that came with the kit?
- Sullins male and female edge card connectors. These were truly an inspired find in my electronics junk box. I had a couple of sample packs sitting around for a couple of years, and while I was searching through all of my old components looking for something suitable, these popped up. I used 12-pin 0.100″ variants, but tied the adjacent pins together, giving me a total of 6 pins. I am currently only using two of them for +5V and GND, leaving the others for future use.
- Fuse tap from Cooper/Bussmann – A nifty little widget which lets you power a device from an existing circuit in a fuse block, without tapping or cutting any wires.
Custom Parts
[singlepic id=230 w=320 h=240 float=left]
- An assembly that is permanently attached to the Kuda bracket. A female connector is fixed inside of the assembly, and wired to 5V power.
- An assembly that is affixed to a holder for each device that one wishes to use in the vehicle. In this case, it is attached to the modified Droid dock. Eventually, I will build a second one to hold my Garmin GPS for the occasional times I need to use it.
Both parts were designed by me, and machined out of 1/2″ thick StarBoard plastic. I chose this material because I had it on hand, and it is advertised as being UV-resistant. It’s meant for use on boats, so they’re probably not kidding.
The Build
After buying the official Motorola dock and finding the edge connectors in my junk bin, I mocked up layouts with the actual parts, and sketched out some rough ideas on paper. From these ideas and a clear visualization in my head, I was able to move into CAD/CAM work. After a couple hours I had a clean enough design, so I headed down into the basement to run the part on the CNC mill. Machining plastic is thankfully a fairly stress-free process, compared to running complex metal parts, so work proceeds quickly. Within a half hour I had fine tuned the G-Code and had both parts run.
Assembly went quickly from here, with little advanced planning. A long ribbon cable, chosen because it is by nature thin and easy to route through the dashboard trim panels, was soldered to the female card-edge connector. The soldered assembly was placed into the car-side dock and glued into place using everyone’s favorite potting and adhesive compound, hot glue. Once cooled, this assembly was then affixed to the Kuda bracket.
I disassembled the Droid bracket and removed the rear-facing micro-USB socket, intended to connect to a car charger. Some minor plastic modifications were required on the inside of the Droid dock to allow my custom bracket to mount cleanly. Once I had the mounting scheme worked out, I rewired the remaining micro-USB plug, connecting the power leads to the male card-edge connector, choosing two of the six pins for +5V and GND.
I then turned my attention to the 5V power supply. As mentioned previously, I disassembled the car charger included in the Motorola kit, finding a nice, compact 5V switching power supply inside. Ditching the cigarette lighter plug and soldering on my own leads, I was left with a long, thin PCB with 12V in on one side and 5V out on the other. All I needed was suitable enclosure for stashing somewhere hidden. After searching through my plastic scrap bin for a while, I turned up a hollow translucent blue tube – left over packaging from some fancy Ergon grips I bought for my mountain bike a while ago. Sometimes it pays to be a pack rat! The power supply PCB handily fit inside of the tube, the ends of which were easily sealed up with more of everyone’s favorite adhesive. A bit low-rent, but what the heck – it was going to be hidden away.
Installation
At this point, I had everything ready to go and I just needed to pull my dash apart to install it. I won’t go into detail here, but it’s usually easy to find several guides online to disassemble your dashboard.
[singlepic id=236 w=240 float=right]
I carefully routed the ribbon cable behind the wood trim and down into the glove box area, where the fuse box is located. I then mounted my 5V power supply tube inside of the fuse area using some industrial Velcro. The fuse tap is the last piece needed do a truly non-destructive install. After some probing and experimenting, I located a circuit which was only powered when the car was running, and installed the fuse tap there. The horrific bright blue LED lit up on the power supply, and 5V was present on the dock connector as expected.
Buttoning the dashboard back up and cleaning up any mess left in the car was the last step before the final test.
Conclusions
I’m quite happy with the results for the effort I put into it. It was just about the right balance of DIY and modify-existing so that it was still a fun project, and yet actually got done before I got distracted with other things. I would like to get the Garmin mount done at some point, as well as make a decorative cap for the car bracket that can be put in place when the phone dock is removed, to further disguise/hide it.
[singlepic id=239 w=240 float=left] The next piece of the puzzle is in the works – a custom Bluetooth A2DP stereo audio receiver module which will hook to my car’s aux audio input and also monitor the car’s CAN bus for steering wheel controls to skip tracks. I’m implementing this using an NXP LPC1768 microcontroller (on a BlueBoard), and a SparkFun breakout for a BlueGiga WT32 Bluetooth module. More on this project as it progresses.
[nggallery id=26]

Excellent build – love the idea aand implementation. I’ve been searching for a design similar to your solution for my 2010 GMC 2500 which fortunately includes a USB port into the factory stereo / mp3 control from the steering wheel controls from the factory.
I like the “removable when not in use” function of your design the most, but have you considered making a “blank plug” for the unit and then cover it in the same material the mount uses for a true “stealth OEM” look when nothing is mounted in place?
As the owner of an upholstery shop I’d be happy to help you out on the stitching / wrapping of what you come up with, I’d be even more inclined to help out if you’d be interested in milling and selling a few sets of your plugs for use in my own vehicle?
Nice work
Greg
Nice job! Im also looking to install this on my E92 335i. I have Iphone 5 but possibly going to get a portable Navi. My concern is dissembling the dashboard and glove box installation. This will guide me and was very helpful. Wish me luck !
Ray
Excellent build. This is exactly what I’m looking for for my BMW E90.
I found the KUDA mount but I can’t find a tablet holder that is suitable to KUDA mount.
Can I buy from you a holder for a Samsung Galaxy tab 2 model?
Thank you,
Yannis