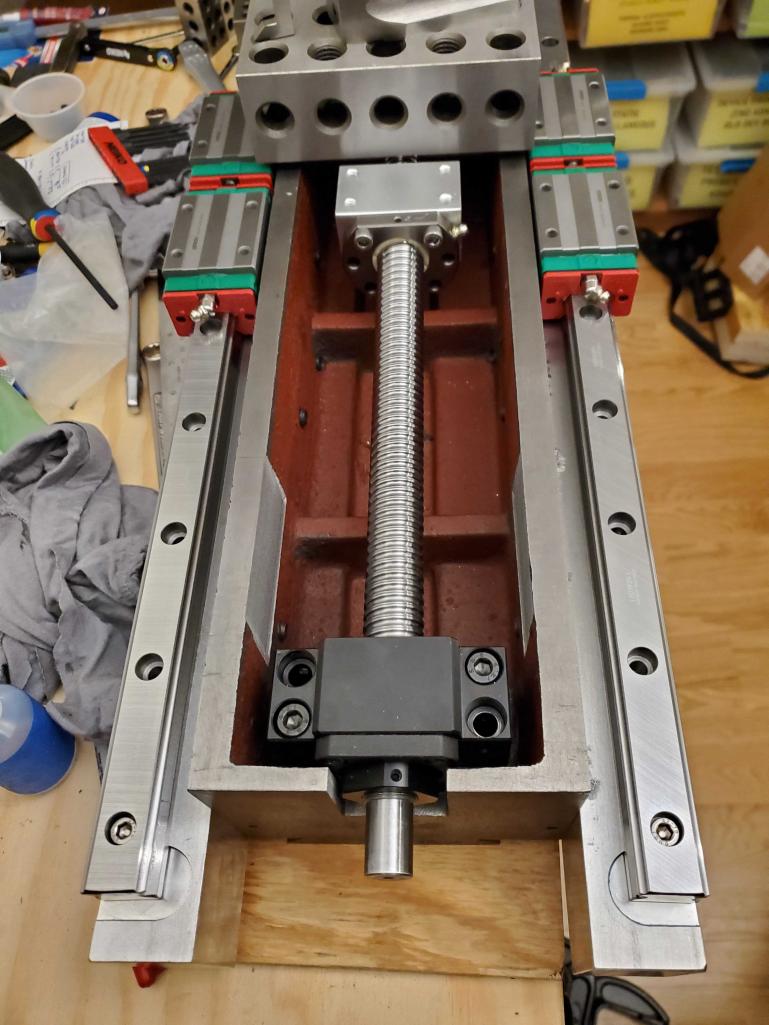
I considered re-using the original Thomson 16mm 0.200″ pitch ball screw from my original CNC conversion kit, but the ball nut wasn’t sounding particularly good after the years of use. The screw also seemed to have developed a bend, perhaps as a result of the buckling load of the heavier Tormach head, or some other mishap over the last decade. The final straw was stumbling across the original Acme lead screw from the machine’s manual days, and noting that it was much larger – about 25mm.
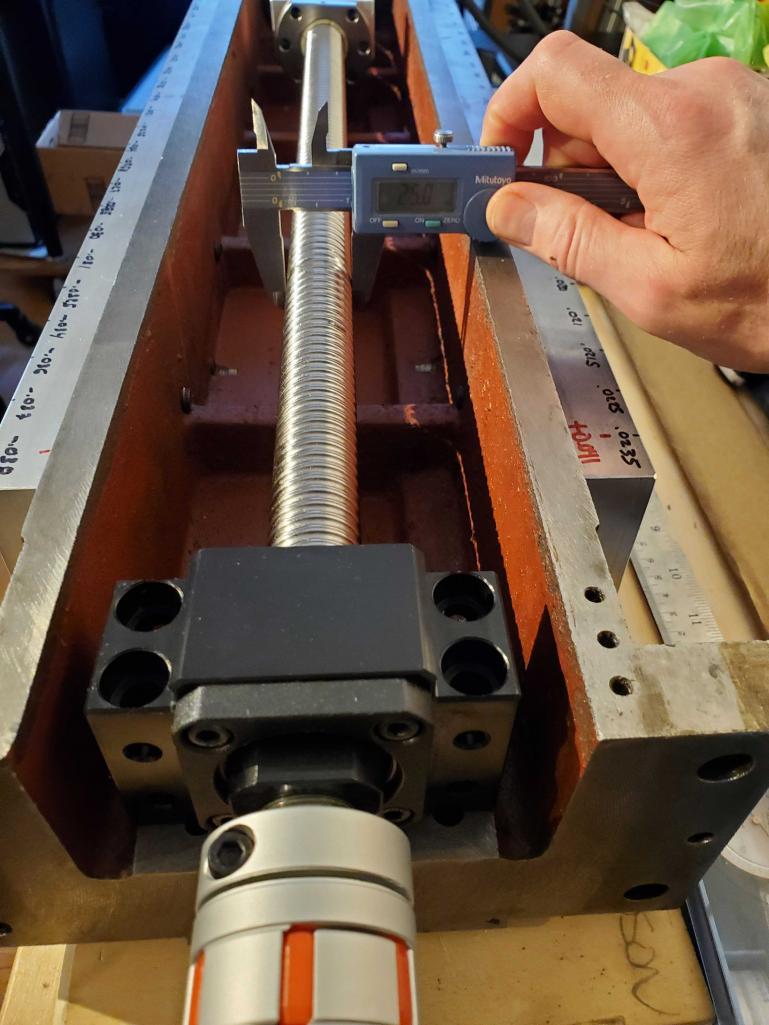
A 20mm ball screw probably would have been a sufficient upgrade to prevent buckling, but given the small price difference to step up to a 25mm, I opted for that based more on gut feel than calculations. A screw radius has a 4th power effect on the inertia of the system, so it can have a large impact on required motor to achieve the desired acceleration. I already planned on an upgraded Z motor for this conversion, so hopefully I’d be able to account for that. I chose a 5mm pitch, which is close to the original 0.200″ pitch of the previous screw. The difference wouldn’t matter as LinuxCNC has screw pitch settings for each axis.

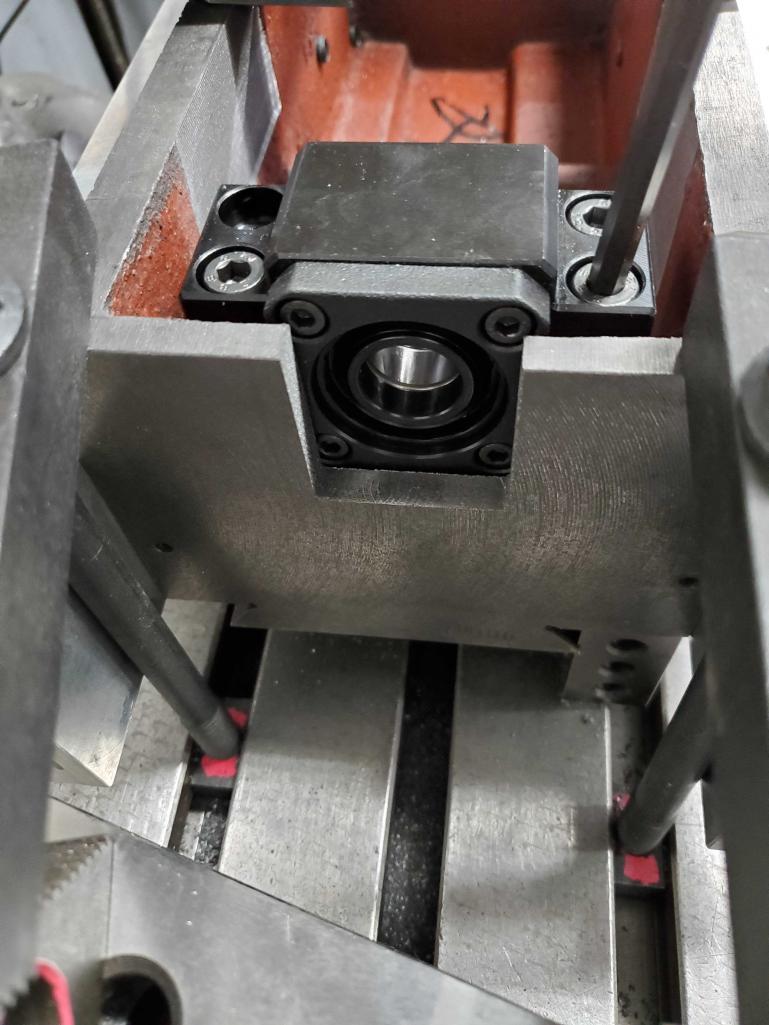
I opted for an affordable rolled screw, figuring that this machine is really not worthy of expensive ground screws. I did buy from a vendor that matched ball nut to the screw, claiming 0.001″ backlash as shipped, presumably by hand-sizing the balls loaded into the nut. I ordered the screw with the ends machined to match a pair of genuine Taiwanese SYK BF20/BK20 end supports.
My intent was to use the original support mounting positions, but I’d have to account for the different bolt hole spacing of the larger supports. I decided to try filling the original holes with JB weld epoxy and then drilling/tapping new holes. There would be some overlap of the new and old holes, which caused some minor headaches.
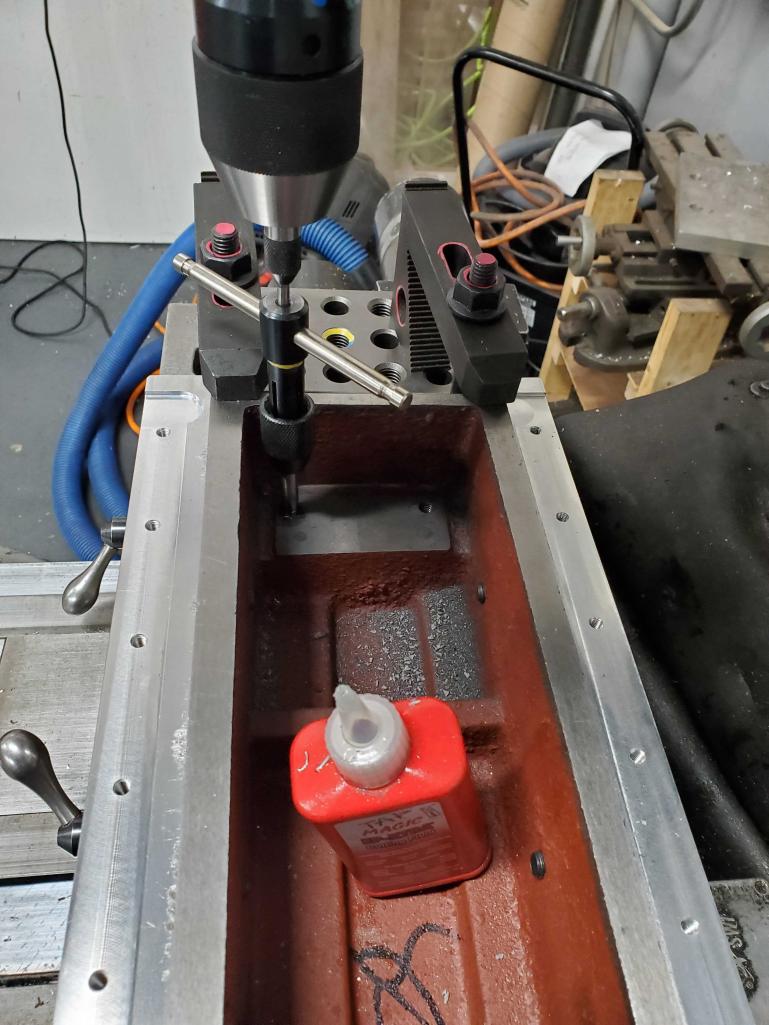
Due to the tight quarters inside the walls of the column, I couldn’t come up with a workable combination of collet or chuck to hold a center drill to start the new holes in the proper bolt locations. I forged ahead and tried it without center drilling first and had a host of nightmares with the drill wandering. Surprisingly the wandering was not when making the initial hole, but as I drilled deeper into the cast iron. I think some of it was related to the epoxy-filled holes as mentioned above – it tended to wander to the softer material. I also think some was my inexperience with feeling out the required quill pressure and peck depths deep-drilling in cast iron. Suffice it to say the holes wandered more than I was happy with, but I did manage to get them tapped and I think they are still true enough to use. I had to abandon one hole and ‘erase’ by plunging a 0.5″ end mill to remove the attempt. I will have to plug this with a turned piece of steel and loctite and try again.
Next up, I needed to create clearance for the end support and ball screw to project through the top of the column. I was reluctant to do this, since I knew removing that much material would reduce the rigidity of the column, but I was confident I’d be able to gain that back by adding a plate on the new face of the column afterwards.
After that, this is what I was left with.